Showing posts with label DIY. Show all posts

Tuesday, February 19, 2013

Wish List: Linea Carta Calligraphy Kit


Last year I discovered Linea Carta on Etsy and immediately fell in love with Diva Pyari's beautiful work.  Her calligraphy is so whimsical...I think I could stare at it all day! I'll admit that I have spent too many hours browsing her etsy shop, website, and blog (anddd maybe even her instagram- eek! I sound like a stalker).  I was thrilled when I heard the news that she was creating a calligraphy starter kit for people like me who are dying to learn her craft.  To my male readers, if your wife or girlfriend spends time on pinterest chances are she would appreciate this gift.  Go ahead- surprise her! I bet you'll receive a beautiful thank-you note :). While you wait for your kit to arrive you can feast on some of Diva's lovely work...


pictures via Linea Carta Blog

Sigh....

-a.e.h. 

Wednesday, February 13, 2013

Valentines Day Crafting Party


For lent this year I have decided to give up "not blogging" which means you will be seeing lots more of me (I am really hoping someone cheered after reading that). Anyways, I wanted to share some pictures from a Valentines Crafting Party I had at my apartment this past weekend for a very special little eight year old.  Just because you are throwing a party for two and/or your guest list includes no one over the age of ten doesn't mean you can't include lots of festive details. 

I picked up these adorable petit fours at Sweet Celebrations.  The gold plated silverware was picked up from a vintage store in Knoxville.  For the centerpieces I picked up roses from the local grocery store, trimmed the leaves and stems, and cut them so they would gather right at the opening of the containers.  For the vases I used a cocktail shaker (with the top removed), a rocks glass, and a Marc Blackwell glass (similar here).  I arranged them on a vintage mirrored tray I found on Ebay.  

We had such a great time making valentines & decorating sugar cookies.  To make valentines I just picked up several packs of blank cards and envelopes- some kraft paper, some red, and some white.  I bought ribbon, pre-glittered stickers (saves so much time and makes less of a mess), some fun paint, and calligraphy markers. To write on the sugar cookies I made a piping bag out of a zip-lock baggie.  You simply scrape the frosting into the bag with a spatula, push it all towards one corner, and snip a tiny bit off the end. 

 I can't wait to throw a bigger (and possibly more adult friendly) party next year. My wish for all of you is that your Valentine's day is full of love!  XOXO!

-a.e.h.
Shop my favorite v-day finds here:


Thursday, September 13, 2012

DIY Bridal Shower

I threw a bridal shower for my Best Friend, Whitney, this past weekend.  I couldn't wait to share some of the pictures with you.  Whitney is very laid back, natural, and has a great sense of style (she is a personal shopper for JCrew).  I really wanted to incorporate all of those things into the shower to make it more personalized.  I hope you enjoy this peek at all of the details!


I love to cook, but I hate to bake so I always order my cakes when I am doing events.  I ordered a 10 inch cake and an 8 inch cake with buttercream icing and no trim. Since they usually charge more for tiered cakes it is an easy money saver to order two smaller cakes and assemble yourself. To decorate the cake I bought several small containers of succulents. I cleaned them in the sink by pulling them out of their containers and snipping the stem down to a quarter of an inch- just enough to be able to stick into the cake.  I gave them a good soap and water bath and then positioned them all of the cake. If you cut the stem too short, simply stick a toothpick down the center of the remaining stem and then position onto the cake. 

I wanted Whitney to be able to take something home from the shower that was really special so I had everyone write her advice, funny memories, and words of encouragement.  I cut out the banner from a roll of kraft paper and then used acrylic paint for the lettering.  I attached it to a cork board that I made earlier this year. 

I always use The Happy Envelope for my invitations.  They are wonderful! 
If you are a bride-to-be, contact them!

We made terrariums out of apothecary jars and mixed them with terracotta plants full of rosemary and lavender and tea cups filled with succulents. 


To make the custom champagne labels I soaked the bottles in warm, soapy water for 1 hour.  I used a scouring pad to scrape the part of the label that wouldn't peel off.  I cut out rectangles out of kraft paper and used acrylic paint to make the design. I used a spray adhesive to attach the label to the bottle.
Shop the brides look here: Dress, necklace

-a.e.h.

Tuesday, September 11, 2012

Inspired: A First Name Written in Monograms

When I saw Leandra of The Man Repeller post a picture of the monogrammed sweatshirt Glamour Magazine had gifted her during fashion week I was hooked.  I love the idea of spelling out your first name with different groupings of monograms.  It is a fresh spin on the old classic. Just buy a plain sweatshirt and take it to your local embroidery shop.  I will definitely be wearing this look for fallLayer the sweatshirt over a colorful blouse and throw on a sparkly collar necklace for good measure. 

What do you think of these monogrammed sweatshirts?  Would you wear this look?

-a.e.h. 

Thursday, March 15, 2012

A Fiesta Themed Bridal Shower: Part 2

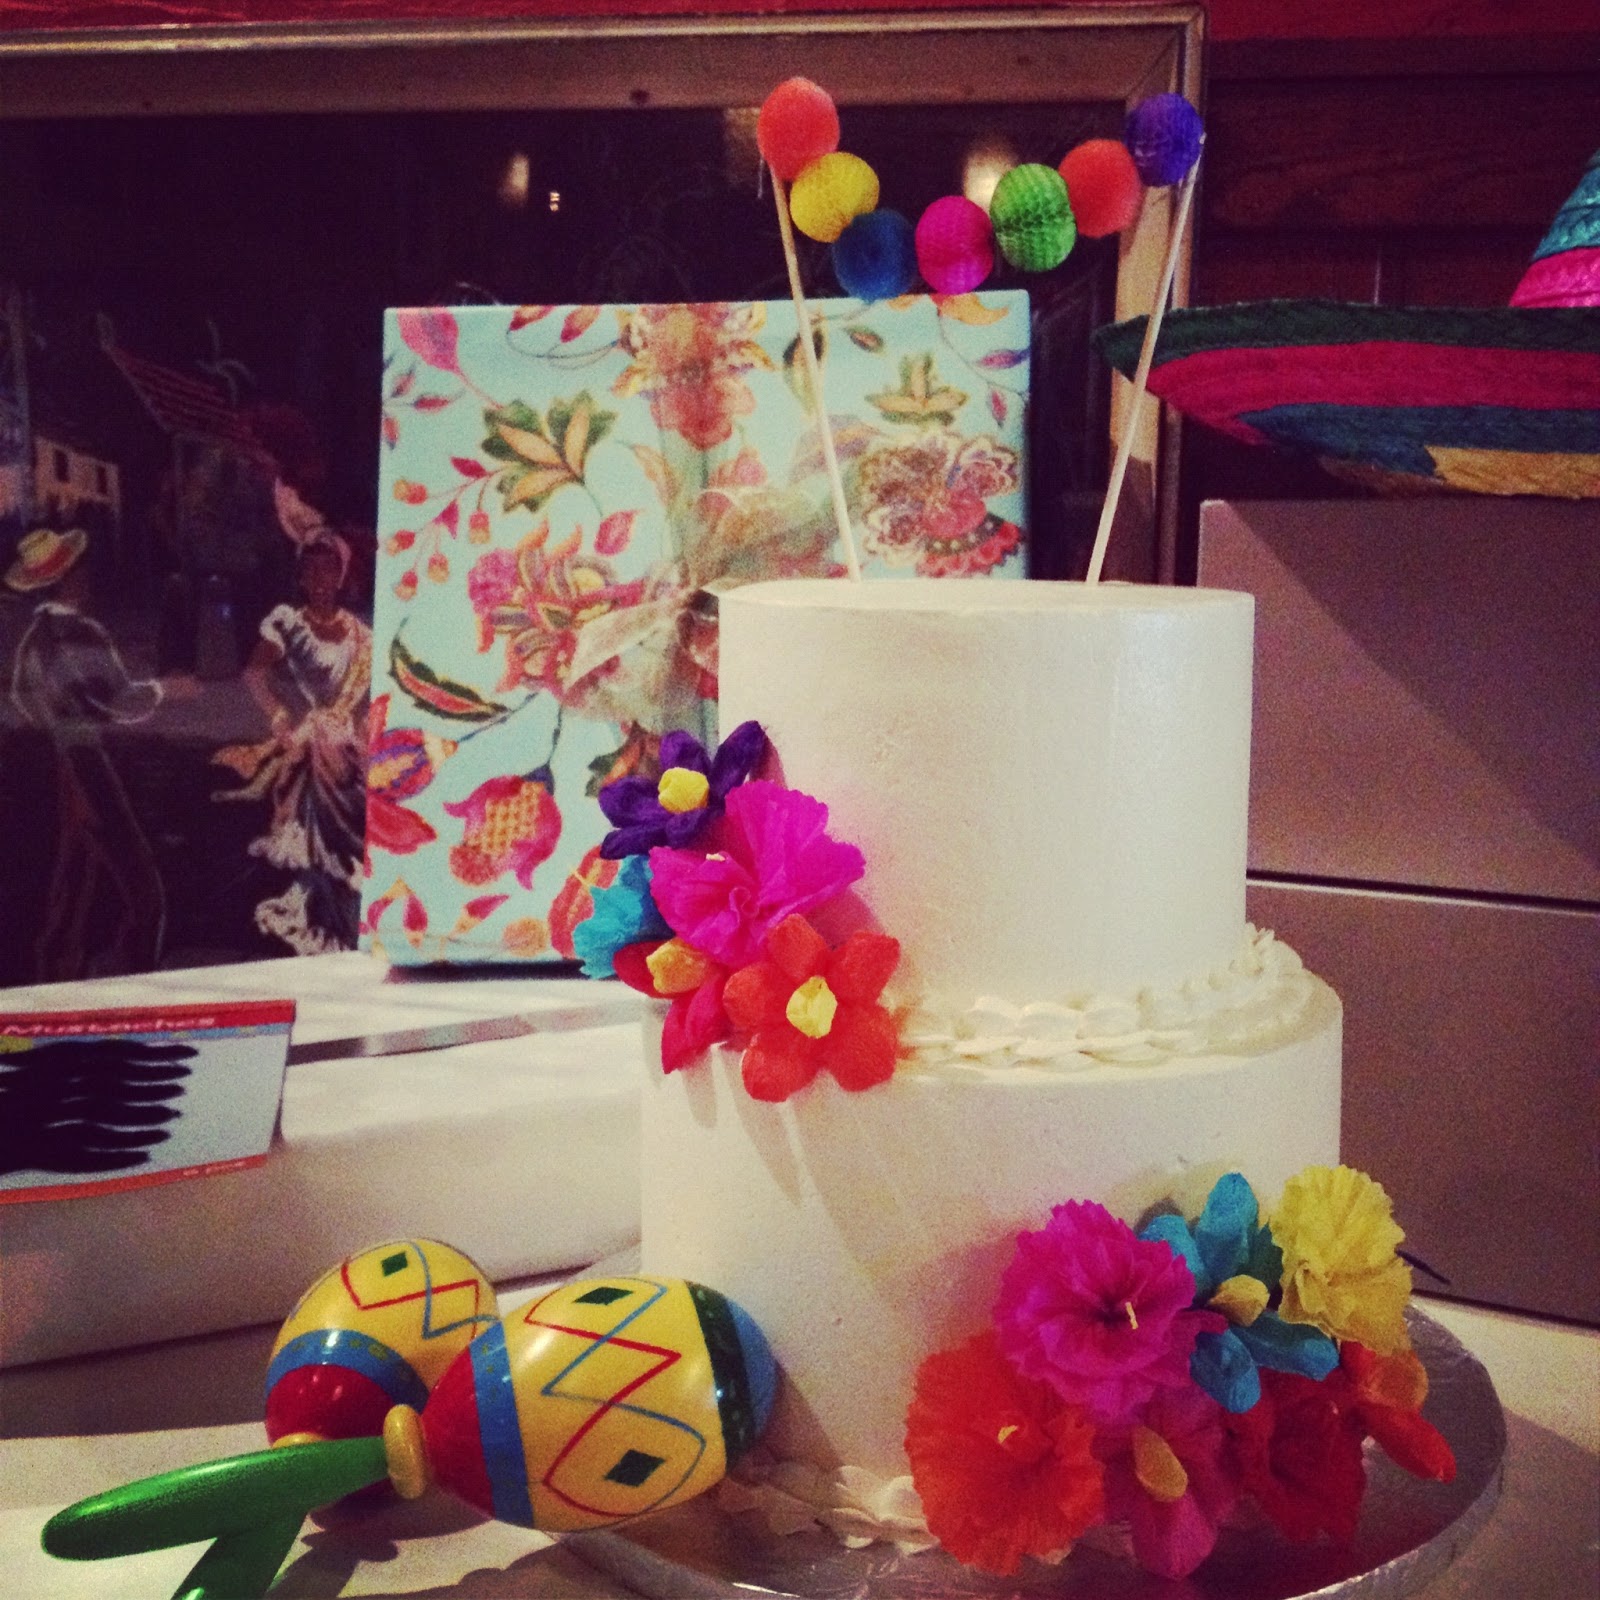
For Caroline's shower I used an assortment of Mexican inspired vases, tequila bottles, and ceramic pots to hold the crepe paper flowers.   I ordered an assortment of flowers from Amols in San Antonio (amazing place for fiesta goods) and made the rest of the flowers out of colorful card stock.   


The adorable little bride with her sombrero veil on!

We brought a few packs of mustaches for photo ops

Thanks to everyone who came to the shower!

-a.e.h.

Monday, March 12, 2012

A Fiesta Themed Bridal Shower: Part 1

Yesterday I had the pleasure of hosting a bridal shower with three of my best friends.  We decided on a fiesta theme for Caroline's shower and wanted it to have a very laid back feel.  We chose Chez Guevara as the location for its whimsical charm and delicious food.  Instead of creating a custom dinner we allowed guest to order off of the full menu.  This worked really well for us, but I do not recommend for groups over 30.  Creating a custom menu narrows down choices and speeds up the ordering process.  We had the tables pre-set with all of the essentials (salsa, queso and pitchers of margaritas) so the guests could start digging in right away!  

We ordered a plain two-tiered strawberry cake
 from Sugar Buzz Bakers & added the decor ourselves.  
Sugar Buzz cakes are AMAZING!! The Mexican crepe
paper flowers were ordered from Amols in San Antonio.
I made this cake topper by stringing pom pom balls
with a needle and thread and attaching to two
bamboo sticks.
Striped straws from Shop Sweet Lulus margaritas.
I actually forgot these in my car :(
We used a long table to seat everyone and brought in
our own cream linens to set it apart from the other
restaurant tables.


Check back tomorrow for more party pics!

-a.e.h.


Tuesday, January 31, 2012

Stool School: How to Use Garden Stools Inside

Lately I have really been loving the look of a garden stool inside the home. A garden stool is very versatile.  These little guys can be used as a seat, ottoman, end table, a great home accent, or even a bedside table.   Buy a colorful stool as a quick way to spruce up a dull room- double them up for twice the impact!  Garden stools can fit in with any type of home decor and are a traditional piece that won't go out of style.  Pick one up at your local goodwill or thrift store, add a coat of colorful paint and you have a cheap & chic new piece for your home!


1 / 2 / 3 / 4 / 5 / 6 / 7 / 8 / 9 / 10

Don't you love them?!

-a.e.h.

Wednesday, December 21, 2011

DIY: Great Gift Wrapping!

I absolutely love giving presents, but I always dread having to wrap them.  I am trying to psych myself up before I grab a glass of wine and spend an evening in wrapping presents.  I found these great DIY gift wrapping ideas, and I couldn't to share with my readers.  I hope they offer some inspiration for all my fellow present wrapping procrastinators!
All images via Pinterest
I love the presents wrapped with sequins (top left)! You can find rolls of sequins (usually elastic) at any kraft store.  Wrap a few times around a simple kraft paper wrapped box and there you go! 

Don't have any cute gift tags?  Run to a local paint store and pick up some color samples.  Punch a hole in the corner, tie on with some ribbon or twine & write your message with a paint marker.  Use a metallic paint marker to be super festive!.  

Merry Christmas!

-a.e.h.

Tuesday, September 20, 2011

Bachelorette Boot Camp: DIY Glitter & Glam

For a great activity at the bachelorette party let everyone decorate their own wine or martini glass using these techniques!  Have lots of rhinestones (put on with hot glue gun), paint markers, and an assortment of glitter colors. Once they are dry everyone can use their glass the rest of the night!

For the lingerie shower, use a clothes line (any string or ribbon will work) & these glitter covered clothespins to display each item the bride opens!

Want more DIY ideas?  Keep checking back this week for more Bridesmaid Boot Camp!

-a.e.h.

Thursday, September 15, 2011

DIY: Decorative Tray

I am a huge fan of DIY projects but only if they don't look like a DIY project.  There is nothing worse than hearing, "Did you make that yourself?"....If it didn't look homemade they wouldn't be asking.  I was excited when I came across this how-to for decorative trays a few months ago on Martha Stewart.  These trays are super easy to make and add a quick splash of color to any coffee table!  


Are you going to try making one of these fabulous trays for your home?

-a.e.h. 


Friday, July 8, 2011

Entertaining Tips: Using Citrus Fruit for Decor

Creating a stunning display or centerpiece doesn't have to be hard OR expensive.  Use citrus fruit for an affordable fix for any party or reception. When you mix the bright color of a citrus fruit with the rich green of it's leaves you get a look that is crisp, clean, and ultra chic! The best part?  You don't have to be a floral designer to acheive this look!

Isn't this citrus wreath beautiful? I am obsessed! Via Elizabeth Anne Designs
Are you as crazy about this lemon leaf garland as I am? Click Here for the how-to!

Pile lemons, oranges, or limes into a pretty bucket or pale add some leaves and viola!
Via Real Simple
A citrus tree in a colorful planter looks great in your home all the time! For a party use a couple on the table for a centerpiece or on a buffet table for decor.

-a.e.h.